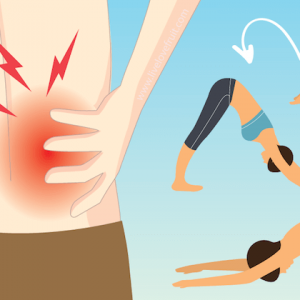
The most common health complaint worldwide is back pain, in one form or another. In America alone, over 31 million people experience lower back pain at any given time.
While you’d likely rather stay in bed all day, or pop pills, research suggests that isn’t always the best idea (who woulda’ thunk?). A study published in JAMA found that any kind of exercise – whether that be core strengthening, aerobic exercise, or stretching – is the best way to ease pain and reduce the risk of any potential back pain attacks (1).
Four Components To Back Pain
Back pain can be caused by a variety of issues. Whether you sit for extended periods of time or have misaligned areas of the body, back pain and hip pain can show it’s ugly face for just about any reason.
What I’ve noticed in myself, and others, is that stretching just one area of the back isn’t going to do much. Often, back pain can be triggered by a weak core, anterior pelvic tilt, a tight piriformis muscle as well as tight psoas muscles.
Too often, people focus on one part of the body, when they need to be focusing on multiple to remediate back and hip pain. This is usually because people don’t know that their core is connected to a healthy spine, and that the way their pelvis sits might determine how extreme their lower back pain is.
Whatever your issue may be, the routine outlined below will be sure to alleviate some, if not all of your low back and hip pain.
Exercises for Low Back and Hip Pain
The exercises below are highlighted for each body part mentioned above. Remember that with stretching and exercising, you need to start somewhere to get somewhere. You might think “oh I can’t do these!,” but that thinking is holding you back from helping your body heal naturally.
Go slow with the exercises and stretches, and if anything hurts too much, just take a step back and go back into the posture more gently. Take your time, and be sure to watch the videos to get a good idea of what you are supposed to be doing if the instructions aren’t enough.
1. Anterior Pelvic Tilt
Anterior pelvic tilt (APT), otherwise known as Lower Crossed Syndrome, seriously wreaks havoc on our lower back, and overall posture. It occurs when your pelvis is tilted forward from your spine (a lot of girls do this to achieve the “thigh gap”). It pulls the lumbar spine into lordosis, making your glutes stick out. It can cause severe low backache, hip or knee pain, and can also lead to extremely weakened lower abs. The APT is caused by a variety of different factors – inactivity, muscular imbalances and poor neural control of posture, to name a few. Fortunately, we can fix this issue, with a couple simple exercises.
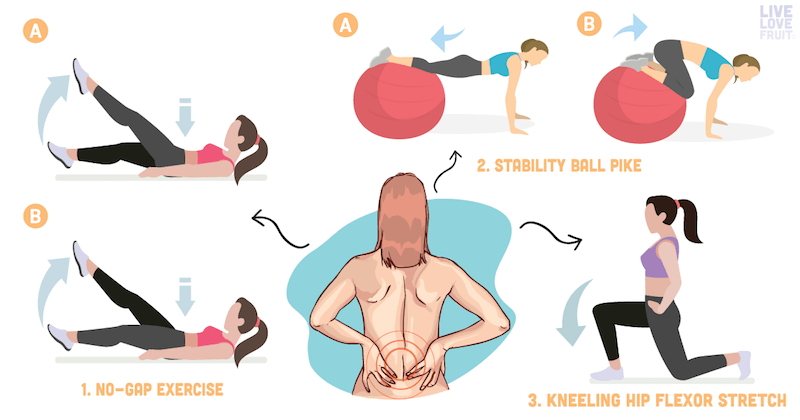
1. Kneeling Hip Flexor Dual Contract Relax (DCR) Stretch
1. Take a kneeling lunge position on the ground with your front leg at a 90º angle in front of you.
2. Posteriorly tilt your pelvis (tuck your tailbone under, glutes tight), and shift your weight forward toward the front knee while maintaining the posterior pelvic tilt.
3. Be sure not to curve the lower back – keep your tailbone tucked.
4. Stay here for 30 seconds – 1 minute, relax, and then repeat on the other side. Perform 3-5 repetitions on each leg.
2. The “No-Gap” Exercise
1. Start the above video at 11:38 minutes to follow along.
2. Lay down in a sit-up position, feet flat on the ground.
3. Tuck your hips down and forward to eliminate the gap between your lower back and the floor.
4. Keep your abs tight, and then start alternating one leg out forward, and then coming back to the starting position. Don’t rest the foot on the floor.
5. You will continue alternating legs until you finish 25 reps per leg.
Note: Make sure the lower back doesn’t lift off the floor. If you’re experiencing any back pain, rest for a little bit, and then come back at it. Most people with a major anterior pelvic tilt will have a hard time with this exercise, but it works really great at correcting it.
2. Core Stabilization Exercises
A lot of people suffer from low back pain because they have weak cores. While you don’t need chiseled abs to have a sturdy back, you should be working your core at least a few times each week to ensure your back is supported. Below are two great core stabilization exercises that will help remediate low back pain. Do them 2-3 times per week to start stabilizing your core muscles. As you start doing these, you will notice a tighter, more toned waist that has almost been “tucked” in.
1. Plank Exercise
1. Make sure that your arms are positioned correctly. Elbows should be directly under the shoulders to ensure proper weight distribution.
2. The spine should remain straight. Avoid rounding out your spine and putting unnecessary pressure on your neck and back.
3. Make sure to tighten your core so that it benefits from the exercise.
4. Keep your legs slightly spread. Pay attention to how your hips feel during the exercise. There should be no added pressure to the hip area. Adjust the distance between your feet as needed.
5. Your breathing should be slow and deliberate so that your core is fully engaged and your body is relaxed.
2. Stability Ball Pike
1. Begin in a pushup position with the tops of your feet on your stability ball.
2. Roll in the ball toward your chest, while lifting or “piking” your hips to the ceiling and engaging the core.
3. Slowly lower to your starting position and repeat 10-15 times.
3. Psoas Exercises
The psoas is a general term, but refers to the combination of two muscles – the iliacus, and the psoas major muscle. The psoas muscles essentially connect the low back to the thighs. If you spend a lot of your time sitting (whether at a desk or in a car), or repeatedly work these muscles (such as in bicycling), they can become short and tight, which eventually results in low back pain, stiffness and pelvic pain. To fix psoas issues, you need to strengthen and stretch the muscles. One exercise above already covers the psoas muscle (kneeling hip flexor stretch), so you’ll be covered in that avenue.
1. Frog Pose (Stretch)
1. Beginning on all fours, bring your forearms to the floor. You can put a blanket under each knee for padding if you like.
2. Widen your knees, one at a time, as far apart as possible, and bend them so that your thighs and your shins are at 90-degree angles. Flex your feet.
3. Keep your front ribs in, your waist long, and your tailbone down.
4. Take 5-10 long, deep breaths. It will likely be very sore, but easing into this difficult pose only takes time and patience.
2. Straight Leg Exercise (Strengthening)
1. Lying on your back, have one foot flat on the floor, knee bent, and the other leg straight.
2. Lift the straight leg up, while keeping your knee straight. Then, slowly lower the leg back down.
3. Make sure you don’t arch your lower back during the exercise, and to not lift the working leg higher than the opposite bent knee (the non-working leg).
4. Do 3 sets of 10 raises on each leg.
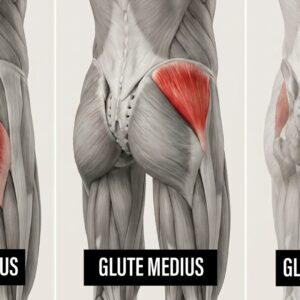
4. Piriformis Exercises
The piriformis muscle is a small muscle located deep in the buttocks, behind the gluteus maximus. It connects the spine to the top of the femur, and allows major flexibility in the hip region. The sciatic nerve passes underneath this muscle on its route to the thigh, but in some people, the sciatic nerve passes right through the muscle, leading to a condition known as piriformis syndrome. If the piriformis muscle is too tight, misaligned, or inflamed, it will cause difficulties when sitting, and can wreak havoc on the lower back (since it triggers the sciatic nerve to flare up). The exercises below will help alleviate a tight piriformis muscle.
1. Pigeon Pose Stretch
1. Laying with your stomach on the ground, place the affected foot across and underneath the trunk of the body so that the affected knee is on the outside.
2. Extend the non-affected leg straight back behind the body and keep the pelvis straight. 3. Keeping the affected leg in place, move your hips back toward the floor and lean forward on the forearms until a deep stretch it felt.
4. Hold for 30 seconds, and then slowly return to starting position. Aim for a total of 3 stretches.
2. Supine Piriformis Stretch
1. Lie on your back with your legs flat.
2. Pull the affected leg toward the chest, holding the knee with the hand on the same side of the body and grabbing the ankle with the other hand.
3. Pull the knee towards the opposite shoulder until stretch is felt.
4. Hold for 30 seconds, then slowly return to starting position.


Carly: Instructions for piking on a ball are wrong (not what the video shows). You don’t start on shins but toes. Great group of exercises.
Ahh, yes, you are correct! Minor typo there – glad you are enjoying these exercises 🙂