If you spend a majority of your day sitting, or perform lots of exercises that include movements like squats, deadlifts, or cycling, chances are your hips are tight. Not only do the hips become tight and painful when under such pressure, but our back is also affected as a result.
There are many different things we can do to help our hips out, but some of the best come from foam roller exercises.
But before we get into the exercises, I want to talk a little bit about the hips and their connection to our back!
The Hips and The Back – What Gives?
A good proportion of the muscles in our hip area are connected to the spine. When our hip flexors are tight, they create an anterior pull on the pelvis, otherwise known as the anterior pelvic tilt. The psoas major and minor (muscles apart of our hip flexors) attach to the vertebrae of the lower spine, so if this muscle is tight and shortened, it pulls on your lower back, and causes some serious pain.
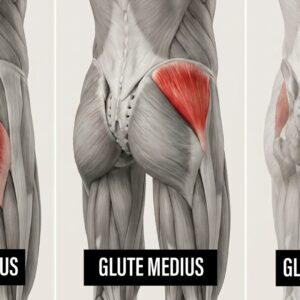
Our piriformis muscle can also become tight and strained due to long periods of sitting. It connects the spine to the top of the femur and allows incredibly flexibility in the hip region. If the piriformis muscle is tight and strained, it can trigger the sciatic nerve to inflame, which gives us pain in our buttocks, low back and hip region.
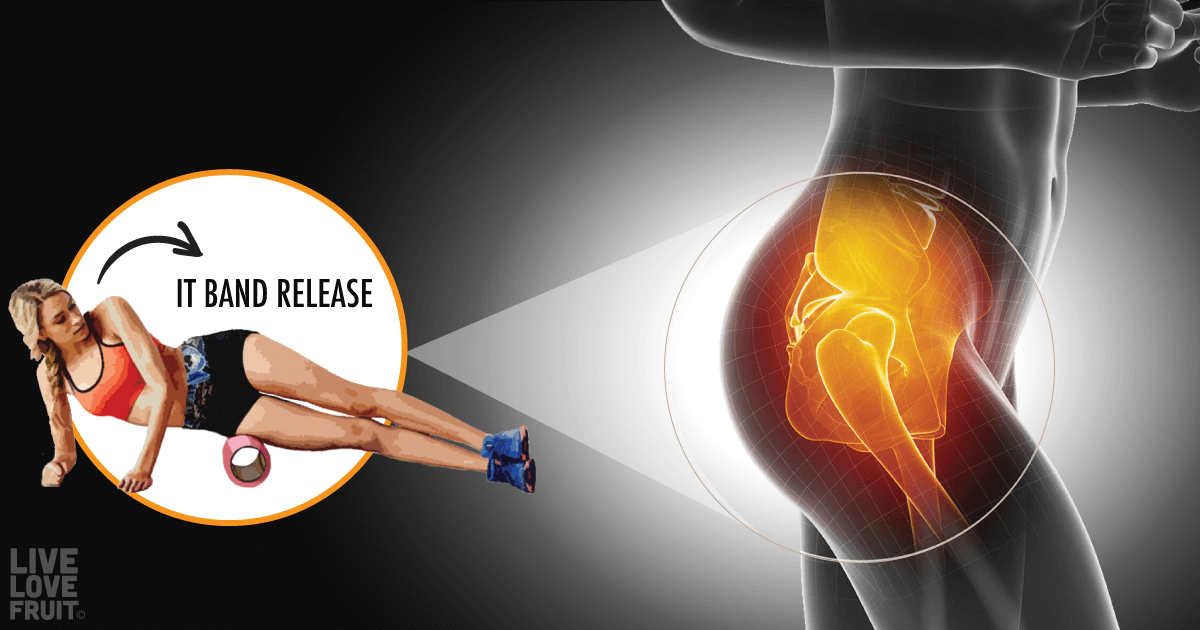
And while the iliotibial (IT) band isn’t directly connected to the spine, it is connected to the hips, so if the IT band is tight, the muscles of the hip become tight, and then the back is triggered.
All other areas of the hip and upper thighs, which I will mention in the stretches below, have the ability to trigger hip tightness, and therefore a sore back. Performing the foam rolling exercises outlined below will give your hips the chance to release and come back to equilibrium.
Releasing The Hips with Foam Rolling
If you have tight hips, you need to invest in a foam roller. In addition to helping release tight muscles, it also helps increase range of motion by reducing delayed onset muscle soreness (1). It can also be used to release scar tissue that has grown around areas of injury.
By smoothing out and hydrating your fascia (aka. connective tissue), a foam roller helps increase flexibility, decrease stiffness, improve alignment and boost circulation. It is one of the best pre- and post-workout tools.
Doing foam rolling exercises often helps open, lengthen and restore soft tissue suppleness to your hips, and it will allow you to move more freely and feel less pain.
If you need a foam roller, here’s the one I recommend.
7 Foam Rolling Exercises To Release Hip and Back Pain
Below are some exercises that will help relieve your hip and back pain.
If you are new to foam rolling, start by using a medium-softness foam roller, and roll slowly around the areas of direct pain.
When rolling out trigger points (aka. “knots”) in the muscles, you’ll start to feel some intense shooting pain as if you were getting a deep tissue massage. Once you’re on the trigger point, hold for 20-30 seconds, and then continue on to the next point.
If something doesn’t feel right, stop immediately. Always go slow, and breathe deep. Try to perform these rolling exercises daily if possible.
1. IT Band Release
1. Lie sideways on the foam roller so that it rests below your outer right hip.
2. Straighten the right leg, and bend your left knee so that the left foot is on the ground in front of your right thigh.
3. Lean into your right palm so that your right arm and left foot are controlling how much weight you are placing on the foam roller.
4. Start rolling on the roller, so that it rolls down towards the knee. Stop and hold for 30 seconds whenever you find a knot, and continue rolling.
5. Roll until you are right above the knee, and then slowly reverse and roll back up towards the hip. Repeat on the other side.
2. Hip Flexor Rollout
1. Lie facedown on your foam roller so that it sits below your right hip.
2. Bring your left leg out to the side at a 90-degree angle, and place your forearms on the ground to prop yourself up.
3. Straighten your right leg back behind you, and start making small back-and-forth and side-to-side movements. When you find a trigger point, hold for 30 seconds, then continue rolling.
4. Repeat on the other side.
3. Figure 4 Stretch
1. Sit on the roller and reach your right arm behind you, placing your right hand on the floor a few inches behind you.
2. Cross your right ankle over your left knee in a figure four position.
3. Shift your weight slightly to the right hip/glute area and roll back and forth a few inches in each direction for 30 seconds.
4. Spend another 30 seconds breathing as you roll in tiny circular movements. Repeat on the other side.
4. Adductor Rollout
1. Lie next to the foam roller so that it is parallel to your right side. Support your weight by propping yourself up with your forearms.
2. Bend your right knee, and place your right thigh over the foam roller so that it rests right above your knee.
3. Start to roll the foam roller towards your groin, until you are right below the groin. Then, roll back down until you’re right above the knee.
4. Repeat on the other side.
5. Prone Quad Release
1. Start on your forearms with your stomach facing the floor.
2. Place the roller under your hips, with your toes touching the floor, knees wide.
3. Keep your core engaged to prevent over-arcing your lower back.
4. Exhale, and roll your body forward so that the foam roller moves down to just above your knees.
5. Inhale as you roll back up. Do this 8 times.
6. Supine Hip Flexor Stretch
1. Lie flat on the ground, with a foam roller resting underneath your knees.
2. Lift your hips and slide the foam roller underneath the sacrum (bottom of the spine).
3. Draw your right knee in towards the chest and extend your left leg out long.
4. Lock your hands around the top of your right knee to deepen the stretch. Hold for 30 seconds, and then repeat on the other side.
7. QL Release
1. Start by lying on your side, leaning back about 45 degrees, with a foam roller under the side of your mid-back, just below the rib cage. Use one forearm and both feet to help support your weight, but put as much weight onto the foam roller as you can tolerate.
2. Roll along the side of your torso, from just below your rib cage down to the top of your pelvis (just below your belt line).
3. Repeat with the roller under the other side of your back.


Wonderful goods from you, man. I’ve be aware your stuff prior to and you are simply too great. I actually like what you’ve acquired here, really like what you are stating and the way by which you assert it. You’re making it enjoyable and you continue to take care of to stay it sensible. I cant wait to learn far more from you. That is really a great website.|
When someone writes an article he/she keeps the image of a user in his/her mind that how a user can know it. Therefore that’s why this paragraph is perfect. Thanks!|