Do you ever find yourself throwing out old plastic containers with clear lids?
I’m talking salad containers, plastic takeout containers, strawberry and other berry containers, rotisserie chicken containers, and the like.
I don’t know about you, but I always feel a little guilty about the large amount of plastic waste that comes with eating a plant-based diet.
Unfortunately, not many companies have invested their time (or money) in developing biodegradable and compostable plastic alternatives (even though many of them exist).
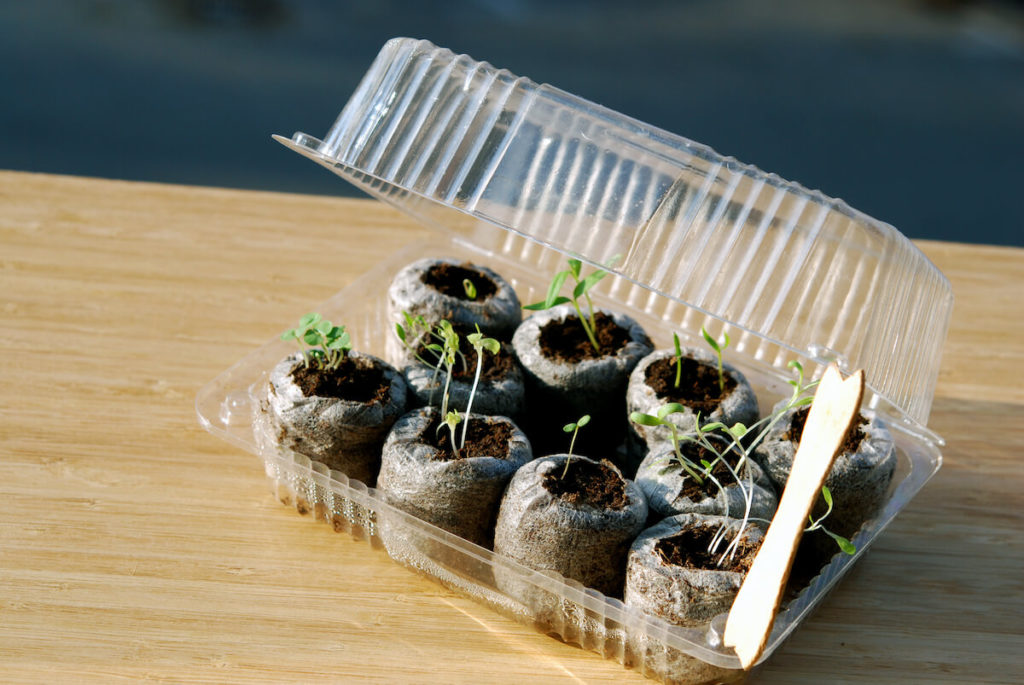
The good news is, is that you can actually repurpose old plastic containers as mini greenhouses for sprouting seeds! You can also use them for starting other versions of sprouted food like scraps you’d normally throw out in the kitchen.
So if you find yourself struggling to raise seeds successfully, these repurposed mini greenhouses could very well increase your chances of raising strong, resilient plants.
What Kind of Plastic Can I Repurpose for Planting?
A lot of people think that you need new pots and trays to start seeds. But what if I told you that you can successfully raise seeds in old repurposed plastic for free?
Every spring I sow seeds into repurposed plastic containers or old trays and containers that were purchased many years back.
I like to start seedlings indoors about a month before planting outdoors, as it gives them an easier, earlier start in life. It also means that I get to eat what I grow a lot sooner than other people.
There are some seeds that I direct sow, like carrots, beets, radishes, and cucumbers, but for the most part, a lot of my seedlings are started indoors.
Seeds that I like to start indoors are squashes, tomatoes (at least 3 months before planting), kale, collards, broccoli, cauliflower, celery, leeks, and melons.
An essential part of growing seedlings indoors during times of the month when the sun is not around many hours of the day is to create a mini greenhouse.
Now, you could go out and buy a humidity dome, but you could also make your own from repurposed plastic containers.
Here are a few ideas of plastic containers you could use as your mini greenhouse:
- Strawberry/berry containers
- Grape containers
- Salad green containers
- Takeout food containers
- Rotisserie chicken containers
- Plastic ‘clamshell’ pastry containers
- Plastic bottles cut in half (keep the top half as the “greenhouse” portion)
- Plastic fruit cups or yogurt parfait cups
- Plastic cups with domed lids (like you’d get from a coffee shop)
The only thing you want to make sure is that the top portion of these containers is clear, see-through plastic. You are trying to mimic what a plant would experience in a real greenhouse.
Now that you have your plastics, it’s time to get planting!
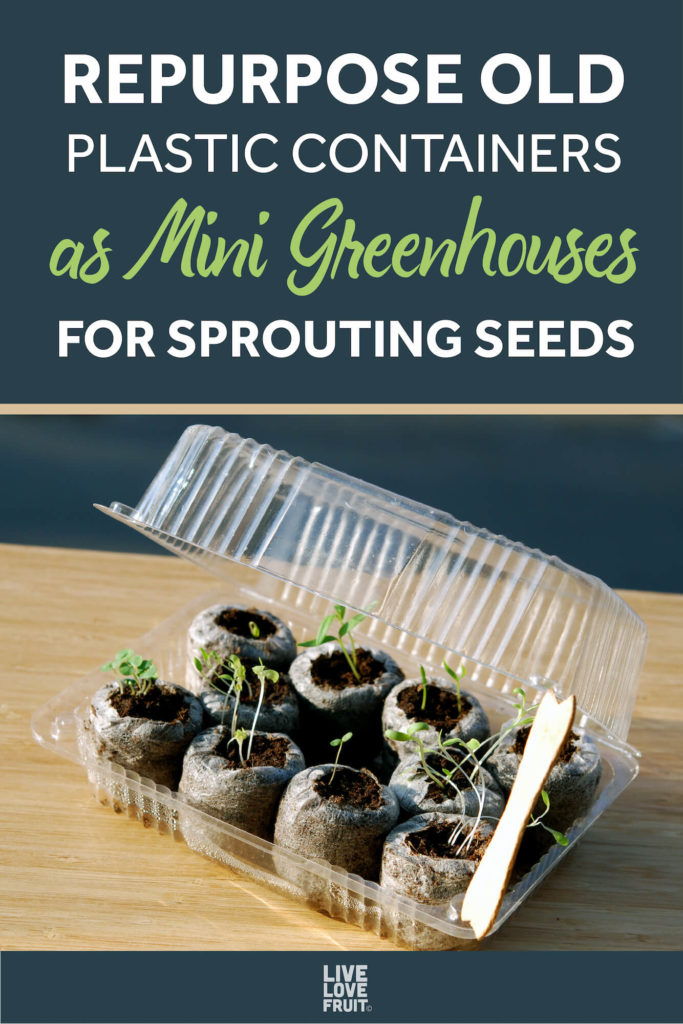
How to Repurpose Old Plastic Containers as Mini Greenhouses for Sprouting Seeds
Repurposing old plastic containers as mini greenhouses for sprouting seeds isn’t as hard as you think. All you need is some mud, some seeds, and some water and you’re good to go.
So if you’re feeling nifty, thrifty and just want to reduce your impact for creating more plastic waste, these are the steps you want to follow for repurposing your own mini greenhouse:
- If you want your seeds to grow successfully, you have to provide them with a soil that is biodynamic and rich in vitamins and minerals. Seek out an organic potting soil mix, or even some Sea Soil if nurseries in your area carry this brand. If you can’t afford to purchase some soil but you have access to a forest or back yard, gather some soil from the ground and put in a pail to take home with you.
- Clean out any plastic containers with clear lids you might have on hand (reference the list above). Clean them well, and let them dry.
- Add soil to as many repurposed plastic containers as you need. I usually estimate how many plants I’ll want in my garden, and sow as many seeds accordingly. I usually plant two seeds per hole, just in case one seed is a dud.
- Read the instructions on each of your seed packets, and plant accordingly. If it says to sow the seed 1/4 cm in the soil, then sow the seed 1/4 cm in the soil. Lightly pat enough soil on top of the seed so that it doesn’t float up when you water. You can also use little peat moss soil circles that grow as you water them.
- Once all the seeds have been planted in your containers, give them a light misting of water on top to help compact the soil. Once they have this base-level of moisture, I like to very gently water them until the soil is damp. Spraying with mist first will prevent the soil from bubbling up and disturbing the seeds you just planted.
- Secure your greenhouse lid on top, whether that is the clamshell lid from a strawberry or pastry container or the other half of a cut plastic bottle.
- Place your seeds in a sunny area so they receive the warmth they need to sprout.
- Water your seeds only if you notice the soil starts to dry out. Mini greenhouses usually generate enough heat and moisture to keep the soil damp, but they still need watering every few days.
- Once the seeds start to sprout, let them develop in size a bit just before they start to hit the top of the greenhouse lid. Once they reach this size, keep the greenhouse lid off so that the plants aren’t receiving so much heat and moisture. I kept my lid on for too long one time, and my sprouts died! So make sure the lid is taken off after about 1-2 weeks. If your lid isn’t much of a lid (more like a salad container lid), then just leave the lid on until you see the seeds start to sprout. Some containers won’t have much room to sprout, but they will still provide that early heat and warmth that seeds need to sprout.
- Once your plants start to develop and grow even larger, you can start accommodating them to the outdoor elements by placing them in the shade outdoors (again, lid off). Only do this once daytime temperatures are no longer freezing (15ºC or higher is recommended). Bring your sprouts indoors overnight. Repeat placing them outdoors every day in the shade and where it is not too windy for about 1 week.
- Now, slowly integrate your seedling containers into the sun where they can learn to withstand the heat of the sun. You might want to lightly drape them with a suspended white cloth so that the sun is not too direct. Otherwise, you might burn the plants. Do this for about 1 week.
- Once your seedlings are strong enough to withstand the outdoor elements, it is time to plant. I like to make sure my seedlings are quite dry while transplanting. That way, when I water them in their new home, they don’t go into as much shock as they’re more preoccupied with taking up the water (I don’t know if there is actual science to this, but it works for me every time!).
- That’s it! Now you can just watch your seedlings grow into the full plants they were meant to be!

Other Items You Can Repurpose for Gardening
Aside from repurposing old plastic containers as mini greenhouses for sprouting seeds, you can also use other items around the house that would otherwise be destined for the recycling bin.
These items include:
- Toilet paper rolls
- Egg cartons (paper-based or plastic)
- Paper cups
- Supermarket vegetable trays
- Juice/milk cartons (paper-based or plastic)
Toilet Paper Rolls

Toilet Paper Rolls are great for growing most plants. The cool thing about toilet paper rolls is that they can be directly planted into the ground, and will decompose into the soil. This is great for plants that do not like their roots disturbed like squashes, beans, and peas.
You can cut your toilet paper rolls in half and fold in the bottom half so that a protective barrier is on the bottom. Alternatively, you could put a bunch of toilet paper rolls into a shallow repurposed salad container so that any loose soil falls into the container.
If you notice after a while that your toilet paper rolls start to get moldy and break down, don’t worry. This is a normal process, and the rolls will hold up until you have to transplant.
When planting, make sure that you peel back the top edges of your toilet paper rolls if you didn’t stuff soil to the top of the roll. If you did, then ignore this step.
Egg Cartons

Egg Cartons, similar to toilet paper rolls, are great for starting seedlings. If you use the plastic/styrofoam version, you’ll have to remove the plant to direct sow outdoors.
If you’re using cardboard egg containers, you can directly plant your seedlings into the soil in the container. It will compost over a couple of weeks with regular watering.
Paper Cups

Unwaxed paper cups are the perfect medium for starting seedlings – especially larger plants like tomatoes and squash that should be very well established before planting in the ground.
If you go to the coffee shop often, save your cups for this purpose. Just make sure you poke drainage holes in the bottom so that your plants don’t become waterlogged (again, you can place them inside an old salad container to catch the water).
Supermarket Vegetable Trays

Old plastic trays that don’t come with a lid, like mushroom trays and other fruit and veggie trays can also be used to sprout seeds.
If you can find really deep containers, you can also use them to regrow larger items like green onions from onions, or even radishes!
If your containers don’t come with holes in the bottom, poke some holes and place them inside a larger container so that the soil is well-drained.
The Bottom Line
If you struggle with getting your seedlings to sprout every spring, consider repurposing old plastic containers as mini greenhouses. They will provide the warmth and moisture that seedlings need to successfully sprout.
You can repurpose old strawberry or grape containers, takeout food containers and even salad containers. If you don’t want to disturb the roots of plants that are sensitive to disturbances, you can plant them in things like old toilet paper rolls or egg cartons to direct-sow into the soil.
Do you repurpose old plastic containers or other containers to sprout your seeds in spring? Let me know in the comments below!


I enjoyed reading your article, thank you. I want to spout some Maringa seeds, and would like to know the best way. I small seeds and rather large one.
I have never sprouted moringa seeds myself – here is a great article on that: http://www.moringa-seeds.com/moringa-seed-germination