
Tomato planting season is upon us, and with that comes great responsibility in learning how to properly grow them. This article isn’t for the person who wants to remain comfortable with the tiny 3-foot plants that they’ve been growing year after year. It’s for the people who want to make their neighbors (and their neighbors neighbor) jealous of the spectacle that will soon be their garden.
I started learning how to plant tomatoes from my mother who has been growing them for most of her life. Her dedicated Ukrainian roots run deep, and simply knowing and understanding how to plant things comes extremely easy for her (she has a “green thumb” as some people would call it).
The thing about tomatoes is that you have to plant them with lots of love in your heart, as with any plant. Being kind to your plants throughout the growing season is important if you want them to grow healthy and strong. That, and the following steps I’m about to share with you.
Tomato Terms Explained
Before I get into the nitty gritty on how I grow 5-8 foot plants each summer, I would like to explain some tomato terminology. You’ll probably hear about these types of tomatoes when going tomato planting, or even when purchasing and starting seeds yourself.
Fruit Types
There are so many types of tomatoes out there, but the most popular ones come in the following forms:
– Standard: a medium sized tomato that you would often find in the grocery store. Think of them like the standard all-purpose tomato.
– Beefsteak: large tomatoes with lots of crevices and shape to them. They’re excellent for sandwiches and salads, and even for just slicing and eating as is. They have incredible flavor, but take a long time to ripen, so I always suggest planting these plants from a well-established plant instead of from seed.
– Plum: the traditional Italian tomato for canning and making pasta sauce. They cook and freeze well.
– Cherry: the smallest of them all! Cherry tomatoes are small and round and burst with flavor. They come in a variety of colors that range from purple to red, and even orange and yellow.
Growth Habits
Growth habits will determine whether your plant grows super tall, or remains more dwarf in size. Here is what to look out for when purchasing your tomato plants or seeds:
• Indeterminate (or cordon varieties): this plant grows tall and are typically grown up twine, tomato cages, or bamboo supports. This variety will produce side shoots that will grow into large lateral branches. If you want to increase fruit yield, these branches should be removed. Otherwise, the plant will get too congested and there will be a lower yield of ripe fruit. You can see in the video below what I am talking about:
• Determinate (or bush varieties): these varieties are great for growing in containers or even hanging baskets. They need lots of space (hence the word bush), and don’t grow from a central stem. Instead, they grow lower to the ground, and tend to “sprawl”. Removing side shoots from this type of tomato plant is not necessary as they are ‘self stopping’, and often don’t grow past 2-3 feet wide. Fruits are often smaller and ripen early.
• Dwarf: dwarf varieties are small, compact plants that often don’t grow taller than a foot! They are great for growing in a container, or other area of the garden that doesn’t need much space.
Where and When to Grow Tomato Plants
Tomato plants love the sun, so when planting tomatoes you want to make sure they get over 8 hours of sunlight a day. My backyard is south-facing, so I just plant my tomatoes against my house in a big plot of straw-covered soil. The warmth from the house also provides extra heating for them throughout the day (and night), which tomatoes desire and need to grow plump, juicy fruit.
Avoid planting tomatoes in hedges as the soil can become too dry. Tomatoes prefer moist soil with lots of drainage, and for this reason, raised beds work perfectly. Tomatoes also require fertile, healthy soil. If you want a plant that grows tall, make sure you add plenty of compost or sea soil, as well as minerals (as I’ll discuss below). Soil with clay is also preferable (here in Manitoba, our soil has lots of clay, and our tomatoes grow huge!).
Mychorrhizal fungi is also another great addition for your tomato plants, because they form networks of hyphae, which transport water and minerals to the tomato plant in return for sugars produced by the roots. You can order mycorrhizal fungi online, or at a local nursery.
You shouldn’t plant your tomatoes until the danger of frost has passed. If you’re planting from seed, you’ll definitely want to sow seeds indoors in late February to mid March using a heated propagator or a warm, South-facing windowsill. Soil temperature should be at least 10 degrees Celsius (50 degrees Farenheit) before planting in the ground.
I have never personally started tomato plants from seed (I prefer to purchase my tomato plants from a local organic nursery here who provides many different varieties each year), but if you want to give it a go, make sure you plant in a nutrient-dense compost. If you make your own compost, that is even better. Make sure the soil never gets too dry, and that they are receiving adequate levels of light (not just heat). Too much heat and not enough light will result in tall and weak seedlings – so place them in as bright a position as possible.
How to Plant Tomatoes
Learning how to plant tomatoes isn’t as difficult as you might think. While it might seem like a lot of information, if you have the right ingredients to add to a deep hole (and the straw that goes on top), that’s really all you need. First, let’s start with spacing.
1. Spacing
Before planting you want to make sure there is at least 2-3 feet between plants. I always have a tendency to grow my plants super close to one another, but honestly, they will grow bigger, and produce more fruit if you give them more space. I like to mark the plot of soil with rocks or lightly dug out holes so I know where each plant is going to go before I start digging.
2. Dig a Deep Hole
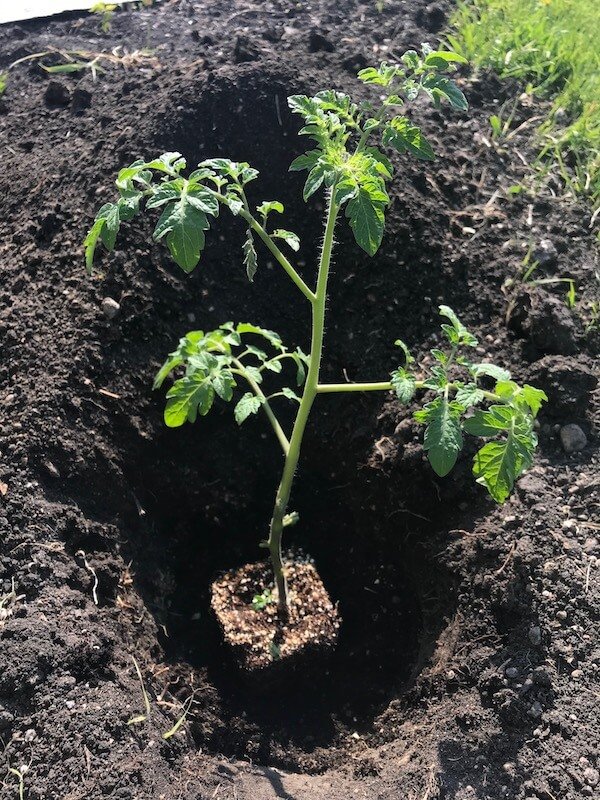
Once you have your spots for planting all figure out, now is the time to dig. I normally dig out a hole that is about a foot or so deep so that there is room to add the compost and mineral dust at the base. Planting tomatoes deep in the soil (almost half the plants worth) will encourage the formation of additional roots along the stem that gets planted. This will produce a stronger, much more sturdier plant.
3. Use Sea Soil (or Compost)
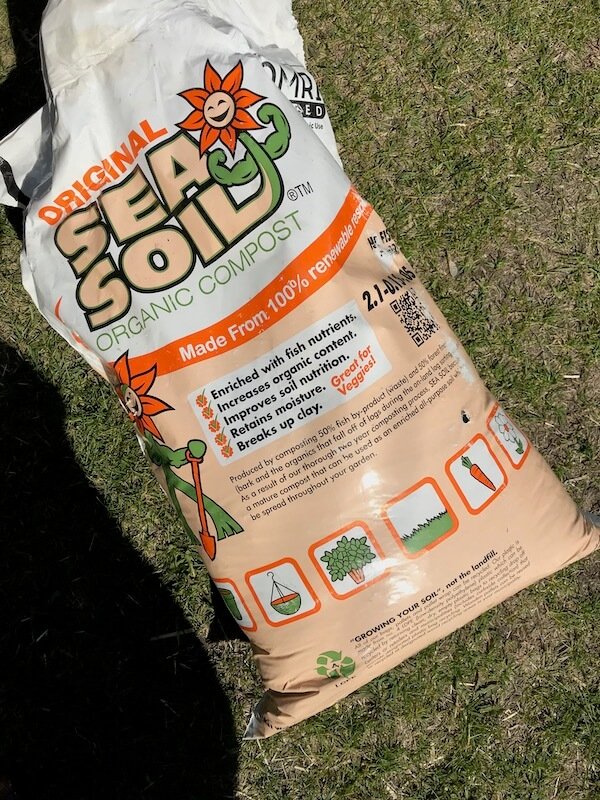
I’ve been using Sea Soil on my tomato plants for about 5 years now, and the results are outstanding. Sea Soil is an organic compost enriched with fish nutrients and “forest fines”. The soil is produced by composting 50% fish by-product (waste) and 50% forest fines (bark and the organics that fall off of logs during the sorting process). It is made from 100% renewable resources, and is great for improving soil nutrition, retaining moisture and breaking up clay. For some reason, tomatoes love fish nutrients, so much so that some people even add fish heads to the base of their tomatoes before planting. While I personally wouldn’t go that route, as I would rather just use by-product waste that would normally be thrown out anyway, some people do choose to use fish heads (eek!).
Alternatively, you can also use your own compost soil to grow your tomatoes. I recently invested in a Joraform Composter and will be making my own nutrient-infused compost by adding things like biochar, and azomite (minerals that are great for gardens). Once I have access to my own compost, I’ll probably get rid of my dependency on Sea Soil, but at the moment, Sea Soil does the trick.
Once you’re done digging your hole, add about 2-3 cups of sea soil or your own compost to the base of the hole.
4. Infuse with Mineral Rock Dust
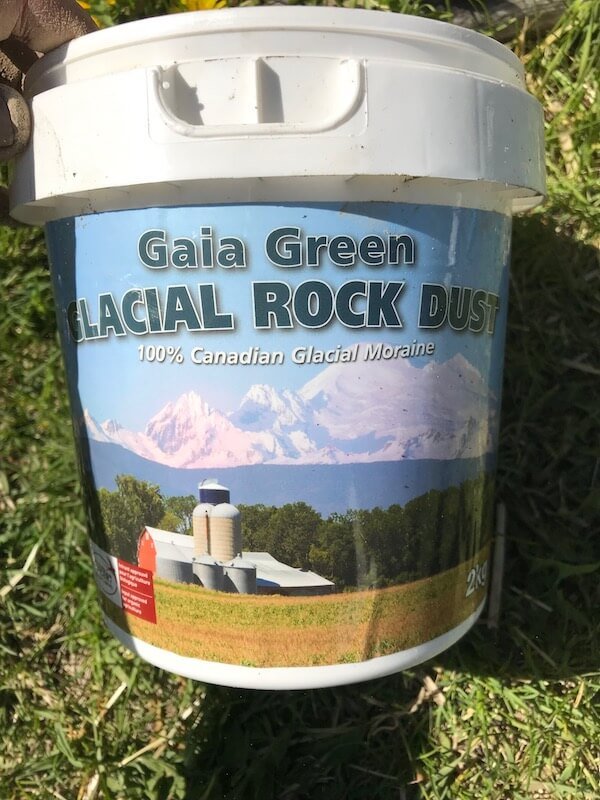
Next, you’ll want to add about 1/4 cup of mineral rock dust to the hole, on top of the Sea Soil/Compost. I purchase Gaia Green Glacial Rock Dust, a 0-0-1 soil amendment that is produced over many thousands of years by glacial action. A wide variety of rocks that contain a broad spectrum of trace minerals are collected and pulverized by the expansion/contraction action of the glacier. As the glacier recedes, it leaves behind deposits of glacial moraine. These deposits are mined, dried, and screen for agricultural and horticultural re-mineralization.
This rock dust replaces key elements that have been depleted from the soil over the years (since Western farming methods like tilling and mass mono-cropping have completely destroyed our soils). Replacing these missing minerals increases soil vitality, which produces healthier plants (and nutrient-dense tomato fruit).
By using a mineral rock dust, you’ll achieve the following:
– Increase phosphorous availability
– Provide an excellent source of calcium, iron, magnesium, and potassium to the soil (as well as many other trace elements and micronutrients)
– Increase moisture holding properties in the soil
– Improve the cation exchange capacity
– Improve soil structure and drainage
5. Water The Hole

Once you’ve added the Sea Soil or compost, as well as the glacial rock dust, you’ll want to water the hole before planting the tomato. My mother always said it was a good idea to water the hole before putting the tomato plant in because the plant goes through minor shock, and adding a bit of water before planting will mitigate some of the shock. Watering the plant once all is said and done is also important, but infusing the base of the hole with water first will ensure the roots have direct access to water as they find root in their new home.
6. Plant Your Tomato
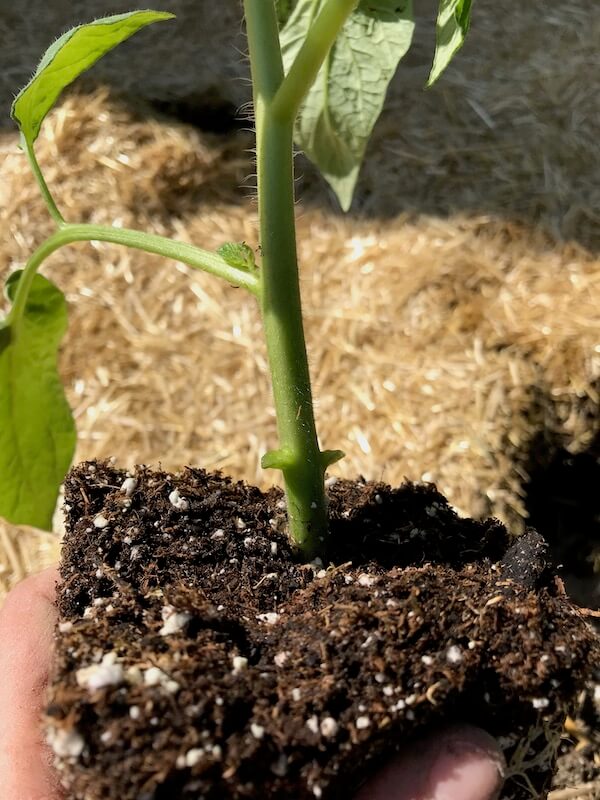
Before planting your tomato plant, you’ll want to remove the bottom most leaves from the plant (see image above). When I plant my tomatoes, I remove 2-3 leaves that grow on the lower portion of the plant. This area will be planted underground, so you’ll really only have the top 3-4 inches sticking up.
Once you’ve picked off the bottom leaves, place the tomato plant in the hole and start filling it back up with mud. I sometimes add more Sea Soil at this point, but it isn’t totally necessary. If you have compost, and lots of it, use that! Cover the hole up well, even creating a sort of mound around the plant. Over half to three-quarters of the plant should be below the ground. This will ensure a strong root system takes hold.
7. Water Again
Once you’re done planting your tomato, water it again, and water it lots. I always give my tomatoes a really good watering after they’ve just been planted. Don’t super-soak them, but give them a hefty drink! Throughout the summer, make sure your tomato plants never get too dry – they might die on you! With the mulch that keeps the soil relatively moist all summer long, I only water every 2-3 days. If you do not have mulch, water every day.
8. Mulch!
Once you’re finished watering and planting your whole plot of tomatoes, add your mulch! Some people add mulch before planting, and dig a hole through the mulch, or add it after. You can do whichever you feel works best. Add a thick layer of mulch, to protect the soil from erosion, encourage healthy bacterial and micro-organism growth, and to prevent the soil from drying out too much. Some people add over a foot of mulch to their gardens, but I usually stick to around half a foot.
I use organic straw, because most of the straw is wheat straw, meaning at some point in its life it was likely sprayed with Roundup (a super toxic herbicide).
9. Stake with 6 Foot Sticks
Once you’re done mulching, add some tomato cages around each tomato plant and stake them with 6-7 foot sticks (easily found, and cheap, at any hardware store). Make sure the sticks are about 1-inch by 1-inch. They should be firmly planted into the soil, right next to the tomato plant. Use cut up panty hose strips to lightly tie the main stem of the tomato plant to the stick (and continue doing so as it grows up the stick).
10. Companion Plant
If you haven’t yet checked out my article on companion planting, I highly suggest you do so! Tomatoes are a bit picky when it comes to companion planting, but they will have a lot more flavor if you plant them next to basil. Borage (a type of flower) is also recommended planted next to tomatoes as it protects the tomatoes from tomato hornworms, and also improves the flavor of nearby tomatoes. In the process of growing, borage also adds trace minerals to the soil that strengthen the tomato plant.
And that’s that! This is how I grow 5-8 foot tomato plants every year. Do you have other planting secrets when it comes to tomatoes? Let me know in the comments below!


Add a handful of epsom salts to the hole too
Sucker the plants… remove any little shoots that grow between the stalk and a healthy branch . Also mix uncented epson salts ..1 tablespoon per gallon and water after the plants are established then once or twice more through out the summer … also I use a bloom to pollenate the other blumes just a gentle rub does the job .. also with large beefstake type tomatoes , trim off the excess blumes … you dont need 4 or 5 tomatos close to gether.
Those are also great tips! 🙂
How close can I plant indeterminate tomatoes? 4’ x 12’ raised garden. How many plants can I have?
Joseph
Plant tomato plants two feet or more apart.