Not all of us have the money to spend over $80 on a massage every day. That’s why I love my $1 tennis ball that can help alleviate the different aches and pains I may experience in any given day.
In fact, doing a routine of tennis ball stretches has allowed me to save money on seeing a therapist, and just doing it myself instead. While massage therapists are incredibly useful, they’re not very budget-friendly. And sometimes you can get to the root of the issue simply by doing it yourself – and these 9 tennis ball stretches prove just that.
Why Tennis Balls Work Better Than Massage
Have you ever went to a massage and wanted your therapist to press harder in a certain area, or maybe they didn’t spend enough time on a spot you really needed to be released? This is why I love tennis balls over massage therapy.
While I can’t discredit massage therapy (I see an awesome massage therapist every couple weeks), I would be lost without my tennis ball in between sessions. In fact, my tennis ball works so well, that I am reducing the amount of massage therapy sessions I require in any given month.
Using tennis balls for self-massage can also be thought of as self-myofascial release (SMR). SMR treats skeletal muscle immobility and pain by relaxing contracted muscles, improving lymphatic and blood circulation, and my stimulating the stretch reflex in muscles (1).
People also use foam rollers to perform SMR, but they tend to be a bit bulky, and can’t get in awkward spots like the neck and deep points in the hip. Tennis balls, on the other hand, are small, portable and you can virtually take them anywhere (perfect for an after-flight self-massage).
Tennis balls and lacrosse balls also make it easier to get into tricky trigger points, since they have a smaller surface area.
What is A Trigger Point?
Trigger points are essentially muscle knots that form sensitive spots in soft tissue. This results in a condition called “myofascial pain syndrome.” According to Paul Ingraham at PainScience, “these sore spots are as common as pimples, often alarmingly fierce, and they seem to grow like weeds around injuries. They may be a major factor in back and neck pain, as a cause and/or complication (2).”
Trigger points come in two forms – active and latent. With active trigger points, you can often feel them all day long, causing you to feel pain on or around the trigger point. Latent trigger points are often pain-free unless they are touched (in which case, if you put pressure on it, you’ll usually feel pain there for a few days after).
Trigger points can cause bigger issues, too. They can send pain to other areas of the body that seem completely unrelated. For example, trigger points can cause neck pain, TMJ (lockjaw), back pain, headaches, joint pain, tennis elbow, and can sometimes even be mistaken for full-blown tumors (3).
Using a tennis ball can help release these trigger points by applying pressure on the spots that are triggered, and allowing them to relax.
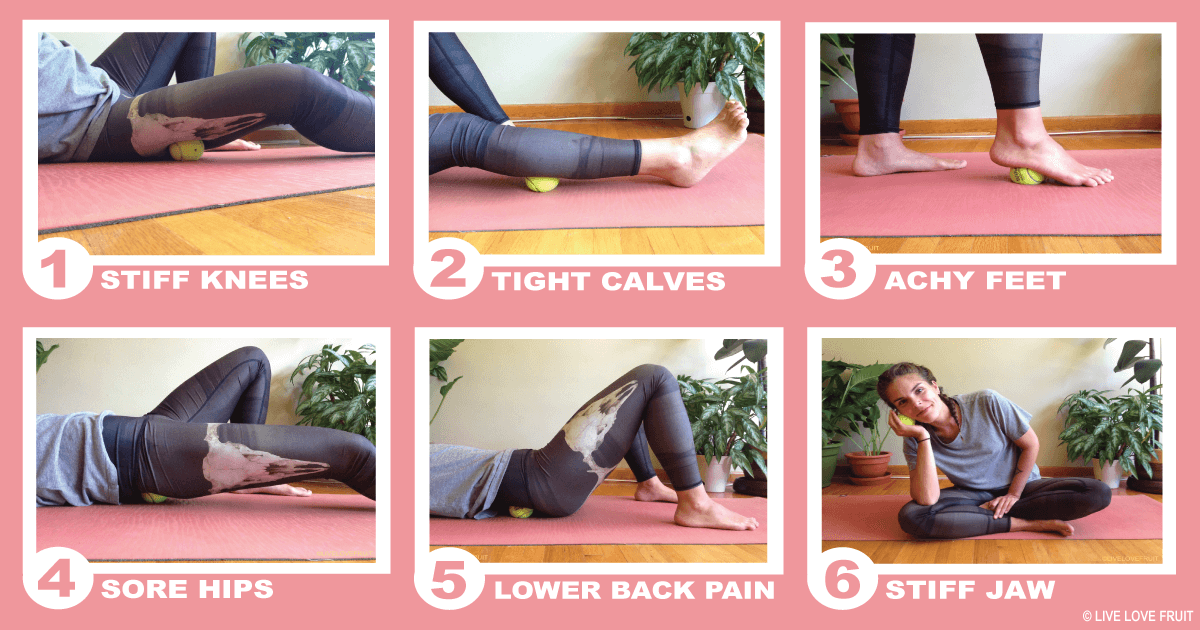
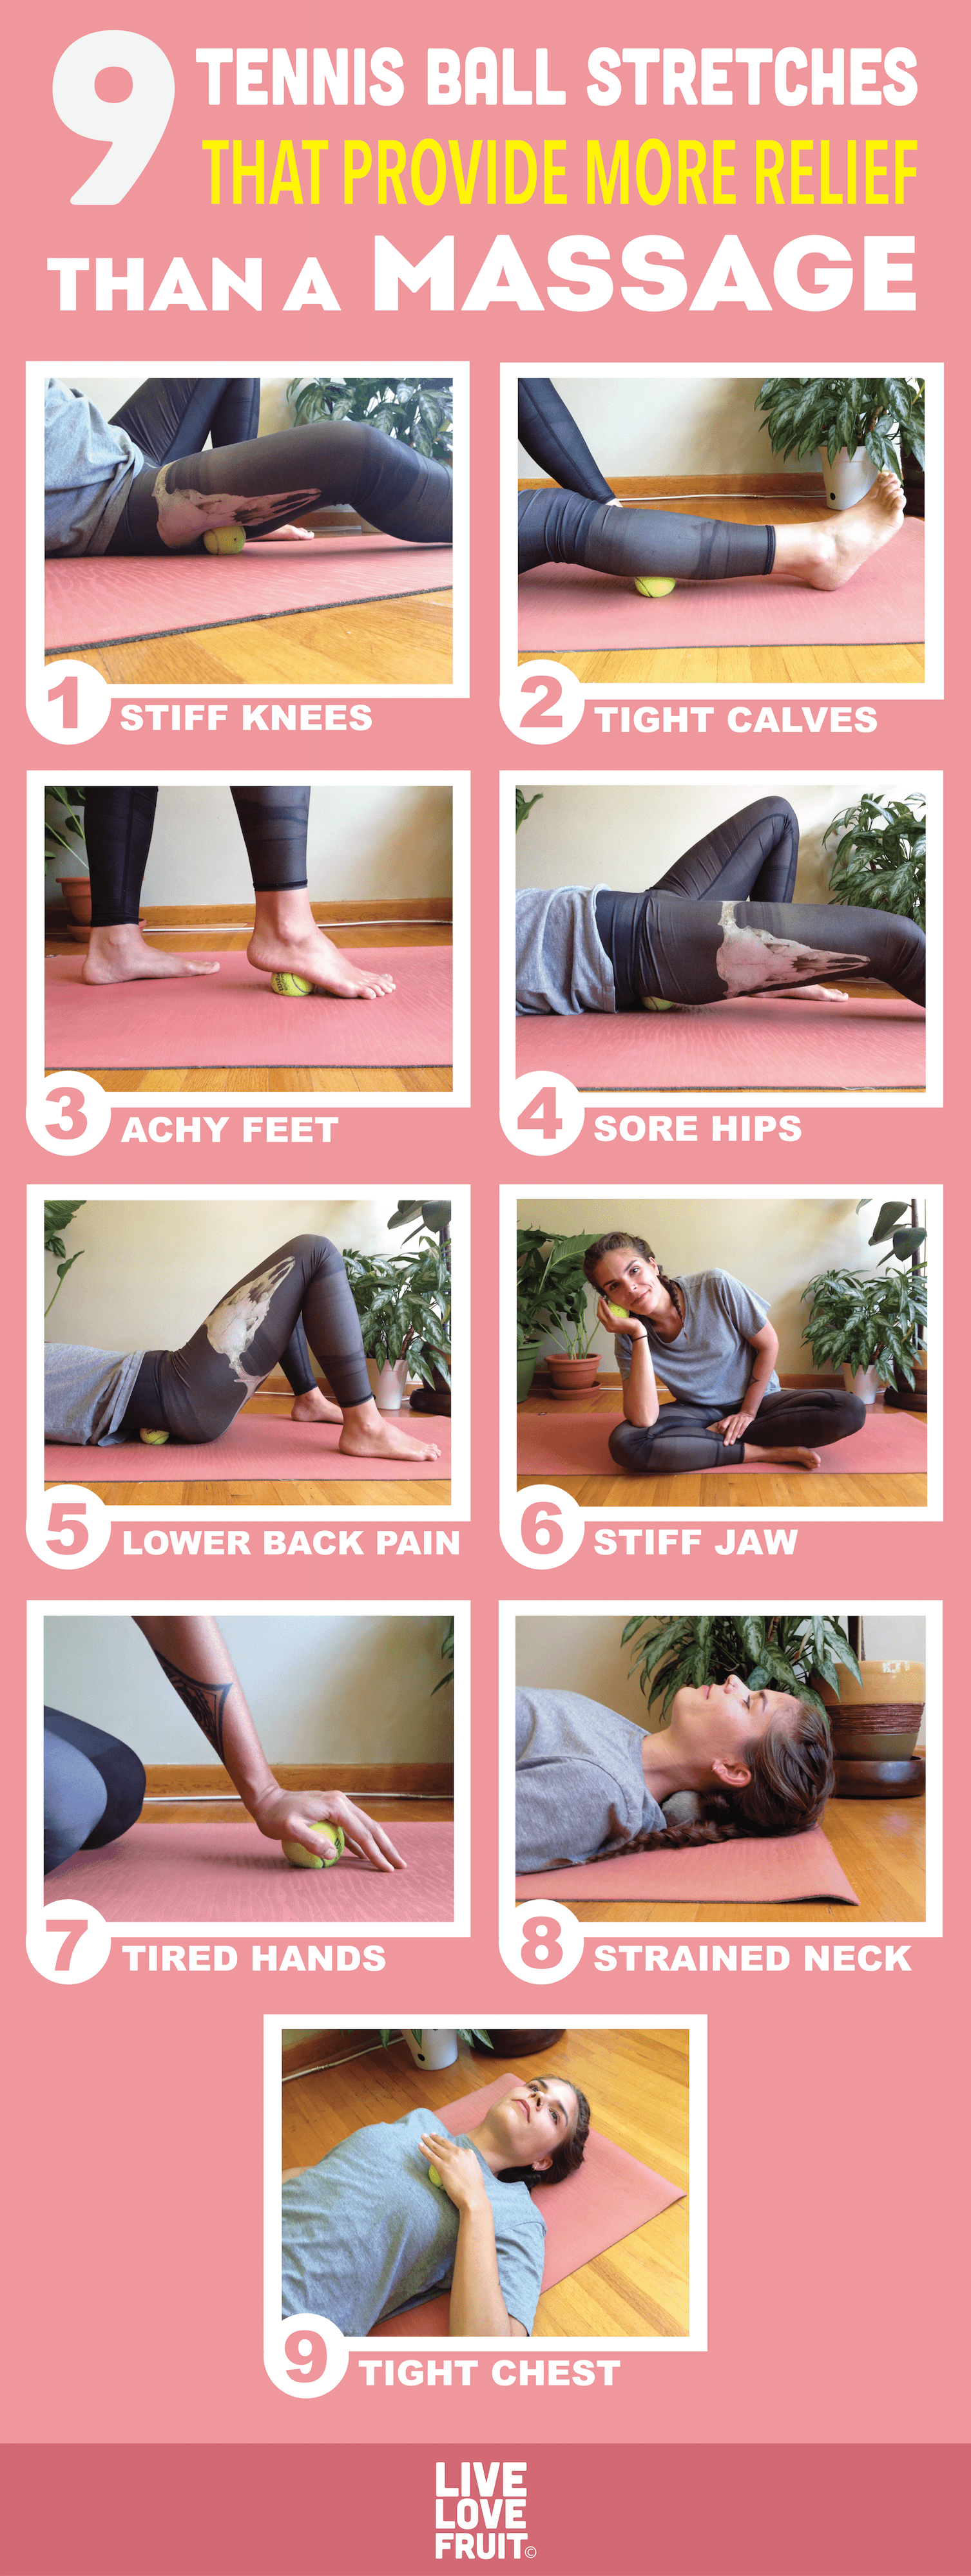
9 Tennis Ball Stretches
Before you get started with these tennis ball stretches, just remember to never spend more than 30-60 seconds on any one area. While most people believe that “digging deeper” will help alleviate pain fast, it can sometimes do more harm than good.
The point of sitting on a trigger point is to encourage relaxation in the areas that are contracted – not cause more contraction by aggravating the muscle. This is why I like the tennis ball (or even something softer) for beginners, because that way you can feel out the pressure and be more gentle on the body. As you get more used to the areas that need work, you can work your way up to a tennis ball, and then even a more firm lacrosse ball.
I have personally been using my tennis and lacrosse balls for the last 3 years. It’s prevented me having to go to the massage therapist, and helps release tight areas of pain that are caused by contracted muscles. I also do yoga and various other stretches throughout the week, so this helps keep the muscles long and limber.
So, without further adieu, grab a tennis ball (or two) and get started with these 9 stretches!
1. Stiff Jaw

Why it helps: Our jaws can become tight by holding our neck in a downward position (such as looking at a phone, computer, or while cooking). This can lead to problems like TMJ. Rolling out the muscles of the jaw can alleviate tension in this area.
How to do it: Sitting on the floor, hold the tennis ball in the right hand and lean your right elbow on your right leg. Using the pressure of your leg against your elbow, press the ball along your jawline from your earlobe to your chin. Gentle, circular motions work great here. Do this for 30-60 seconds, and then repeat on the left side.
2. Strained Neck

Why it helps: Our neck gets strained from being in a static position all day (like if you work a desk job). By rolling out the suboccipital and erector muscles that are responsible for keeping your head up all day, you can help reduce tension and strain in the neck (as well as any nasty headaches that occur as a result).
How to do it: Place two balls side by side in a sock and place them under the base of your skull while you lie on the floor. Start nodding your head “yes” and “no” so that you can feel the muscles at the base of your head start to release. Perform this routine for 10 deep breaths.
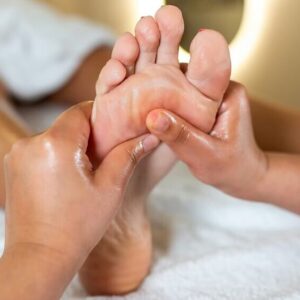
3. Achy Feet
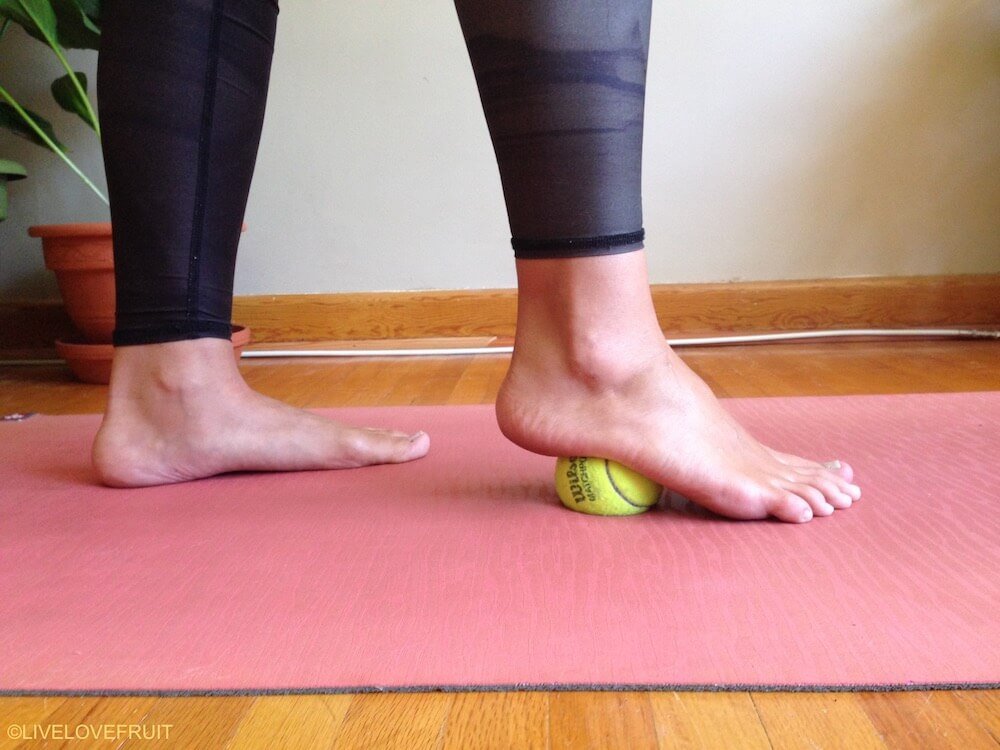
Why it helps: The tennis ball helps release stiff joints, muscles and connective tissues in the soles of your feet. Releasing this stiffness also helps balance the upper body.
How to do it: Stand next to a wall or chair for stability, and place a ball underneath the arch of your foot. Keeping your heel on the floor, inhale and press your body weight into the ball. Exhale and release the pressure. Repeat this for 60 seconds, and then do the other foot. You can also roll the ball along the whole length of the foot once you are done releasing the pressure in the arch.
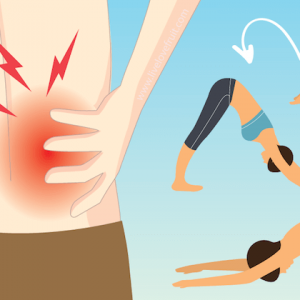
4. Lower Back Pain
Why it helps: This move helps to relieve tension in the back by focusing on the muscles of the lower back. A relaxed lower back allows the rest of the spine to sit correctly.
How to do it: Lie on your back with both legs bent and feet flat on the floor. Place each ball on either side of the spine below the two bony bones on the back of the pelvis. Try to avoid pressing your weight into any bones. Once your balls are in place, release your body weight into the balls, and breathe deeply for 60-90 seconds.
5. Tired Hands
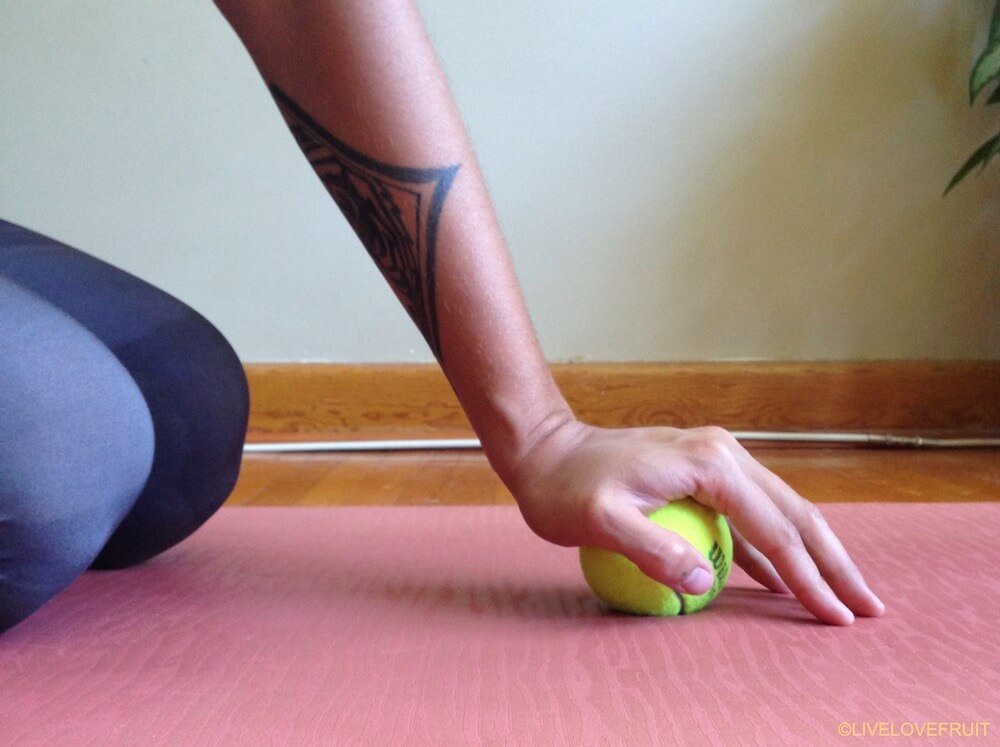
Why it helps: Give your tired hands a break by rolling out the flexor muscles in the palm of each hand. Sometimes we don’t notice how tight the muscles of our hands are until we start applying pressure on different points (you can thank texting, typing, and driving to hand tightness).
How to do it: Start by sitting on the floor and placing a ball into the heel of your hand. Shift your weight forward to apply pressure into the hand – hold here for 30-60 seconds while breathing deep. Now roll the ball in circular motions all throughout the hand for another 30-60 seconds. Repeat on the other hand.
6. Tight Chest

Why it helps: This move helps loosen tight chest muscles and will allow you to breathe easier and stand taller. If you have rounded in shoulders, you need this tennis ball stretch!
How to do it: Start by lying on your back. Place a ball on the left-hand side of your chest and start rolling it around with the left hand. Avoid rolling on the sternum and collarbone – you want to focus on the pectoral muscles. Roll for 30-60 seconds and then repeat on the other side.
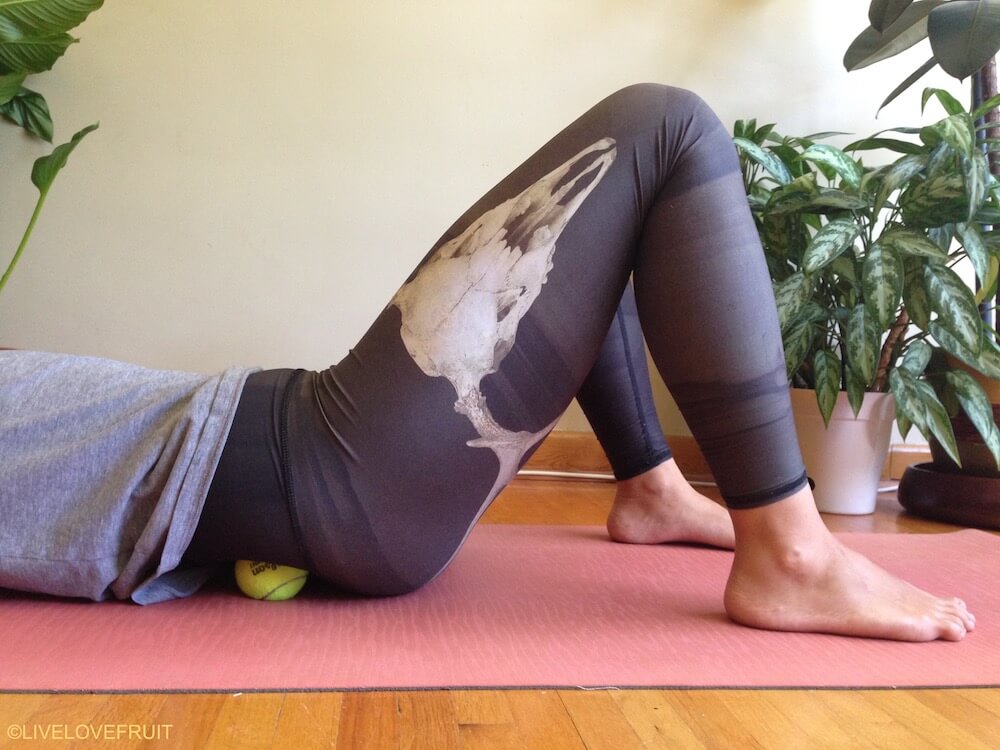
7. Sore Hips
Why it helps: Applying pressure to this area will help target the gluteus maximus, gluteus medius and piriformis muscle. These muscles become tight when we sit for extended periods of time, which, unfortunately, many of us do.
How to do it: Lie on your back with your knees bent and feet flat on the floor. Place a ball under the right side of the hip and drop the right knee to the side. Start to roll your body weight from right to left across the ball, breathing deeply while doing so. Perform this action for 60 seconds, and then repeat on the other side.
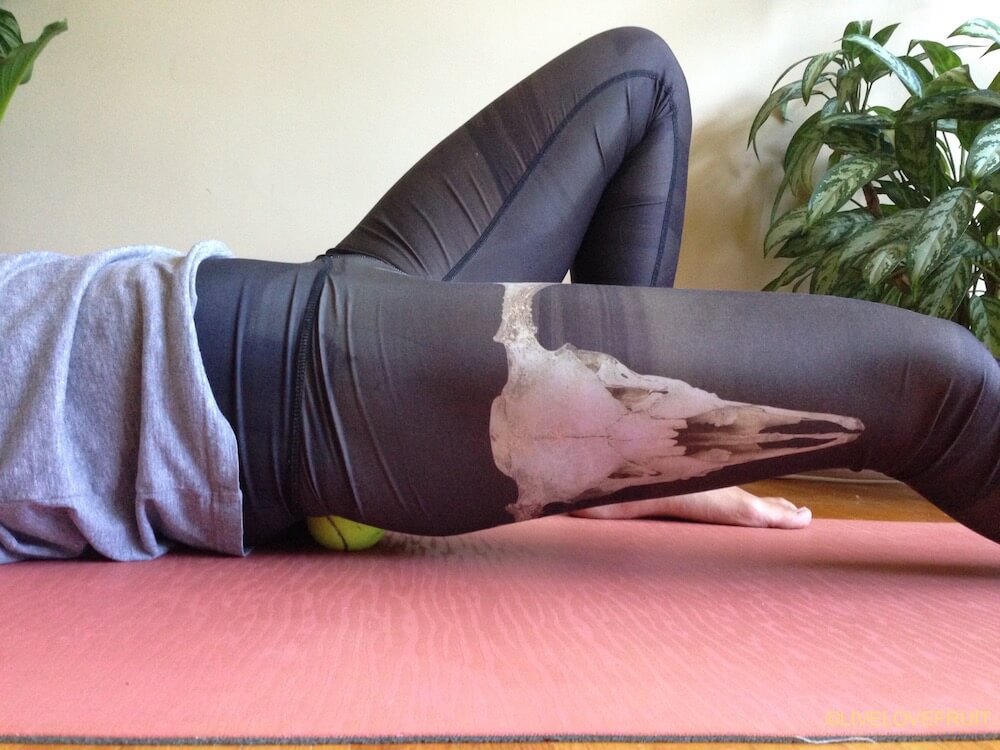
8. Stiff Knees
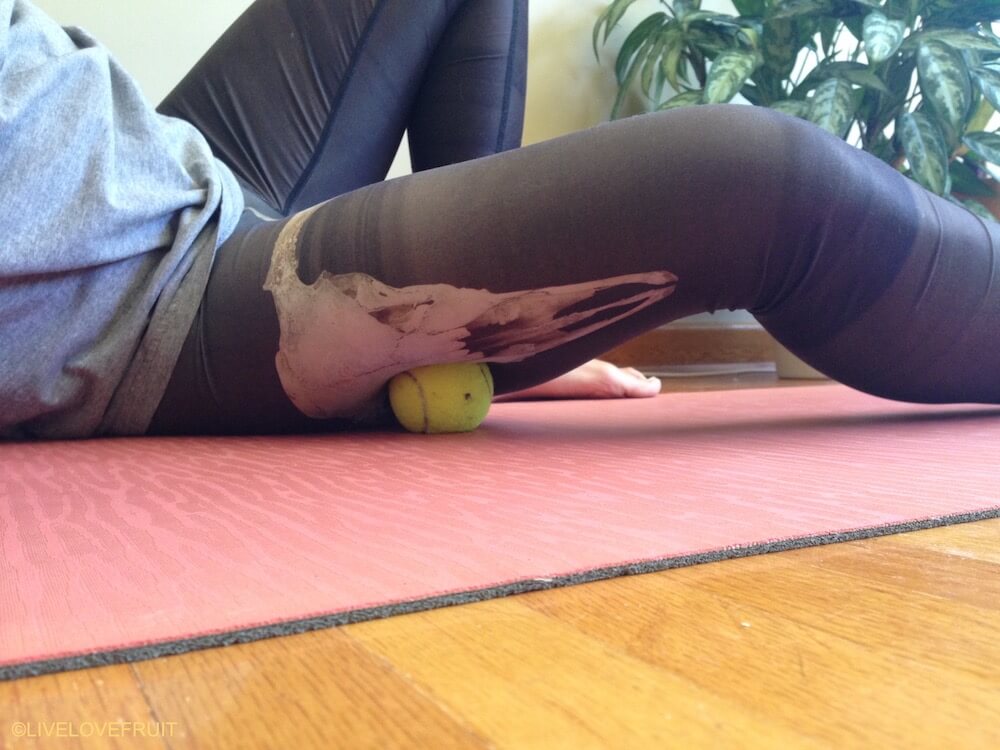
Why it helps: The tennis ball helps to release tension in the iliotibial (IT) band, which has the ability to store long-buried traumas. You might cry a little bit in this move (as I once have), but it’s not because the move is painful – it is more so an emotional release. By releasing the fascia in the IT band, pain and stiffness in the knees can be resolved.
How to do it: While leaning on your left forearm, extend the left leg out and keep the right leg straight to support your body weight. Place one or two balls under the outside of the left thigh and put your weight into the balls. Start rolling from side to side and down the thigh lengthwise. Do this for 15 deep breaths, and then repeat on the other side.
9. Tight Calves
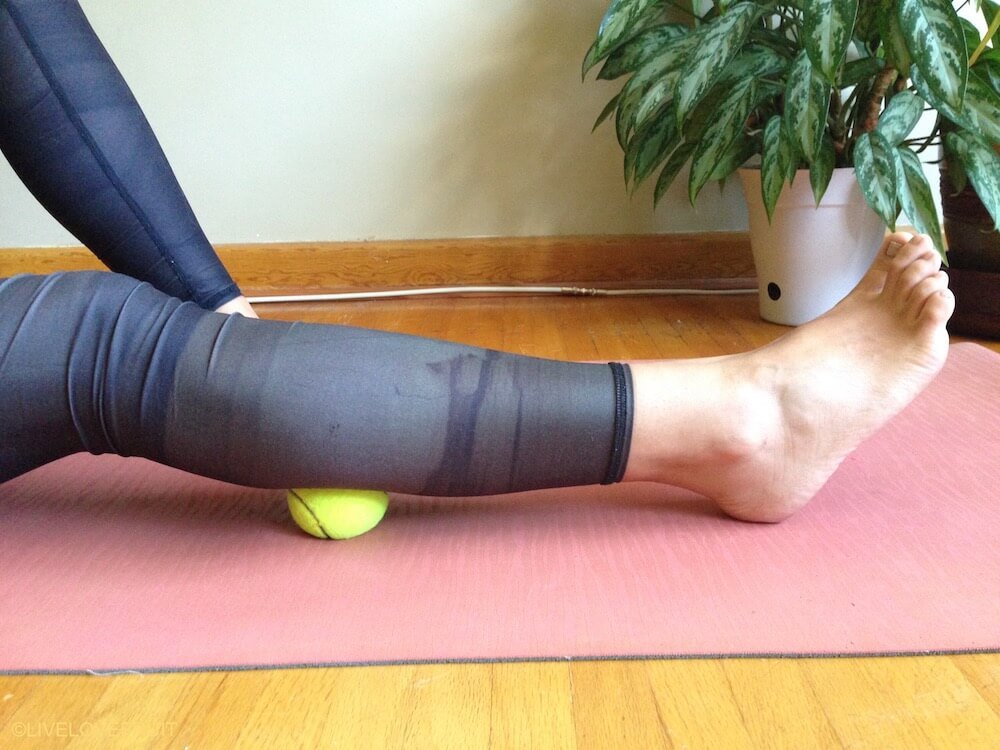
Why it helps: Massaging tightness in the calves can help release tension in the muscle that connects the hell to the back of the knee.
How to do it: Sitting on the floor with the left leg extended, place one ball underneath your calf about midway. Start to rock your leg side to side across the ball for about 30 seconds. Start moving the balls higher up towards your knee and repeat for another 30 seconds. Do the same action with the ball about one inch below the back of the knee. Repeat on the right calf.


Leave a Reply